Saturday, October 5, 2013

Bento Bag


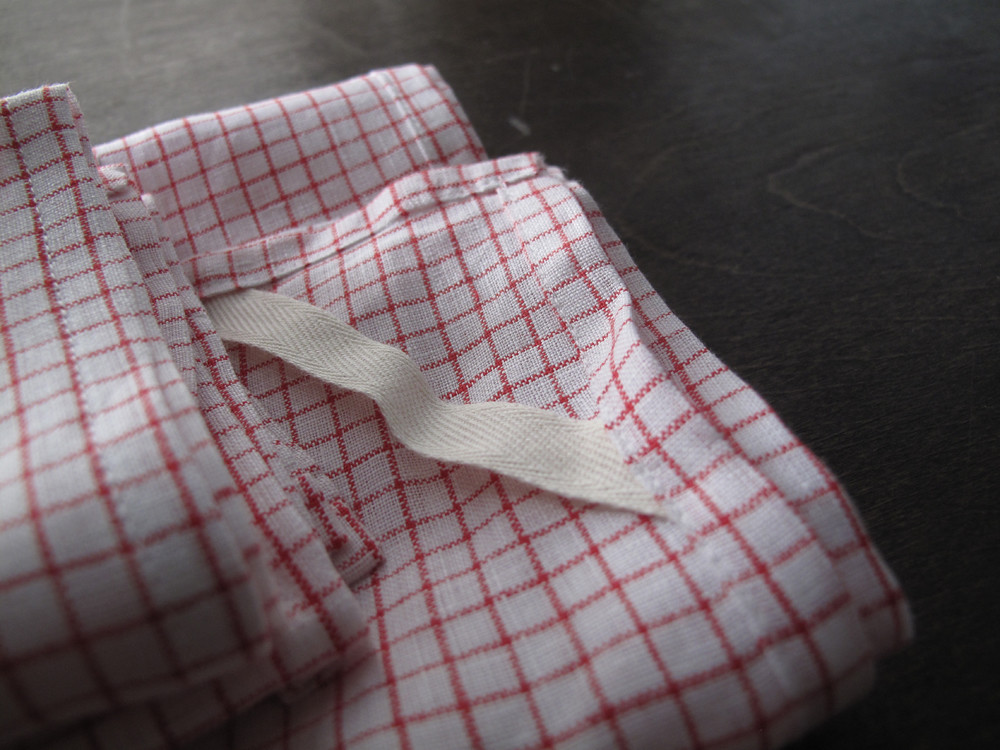
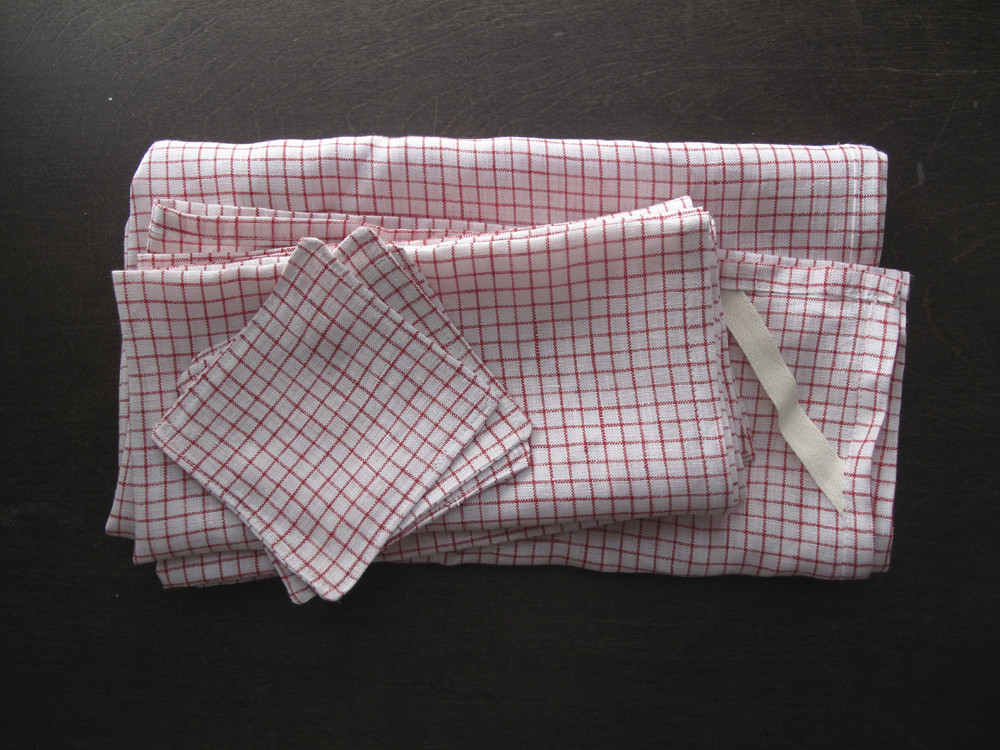
I really love these linen bento bags. They're great for farmers markets and lunches. I also really enjoy the challenge of looking at something and determining the construction. I could tell these were simple in that lovely origami and inside out kind of way that sewing often is — but it took a bit more experimenting and researching to figure this out.


As far as I can tell, there isn't a really good tutorial (I found a couple confusing and incomplete ones) online for making these. I'm happy then to get this out there! All the steps, photos and diagrams after the jump.

Saturday, September 28, 2013

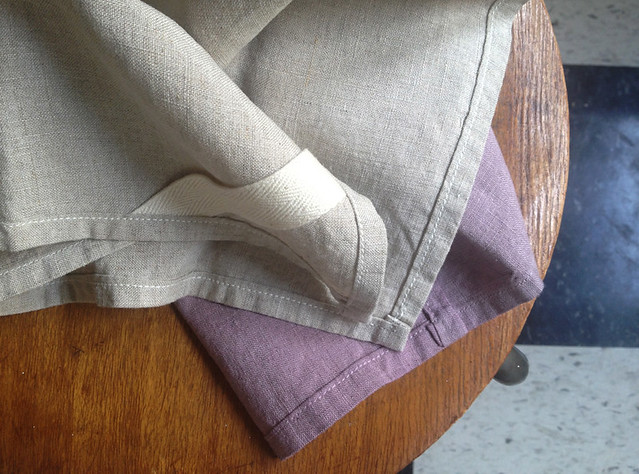
More Coasters, Napkins and Towels

This is the next post in the series of when I sewed for two days mostly just for the sake of sewing.

Because I can never seem to have enough, I made dinner napkins and a kitchen tea towel again. The links will take you to the tutorials I've done here for those.

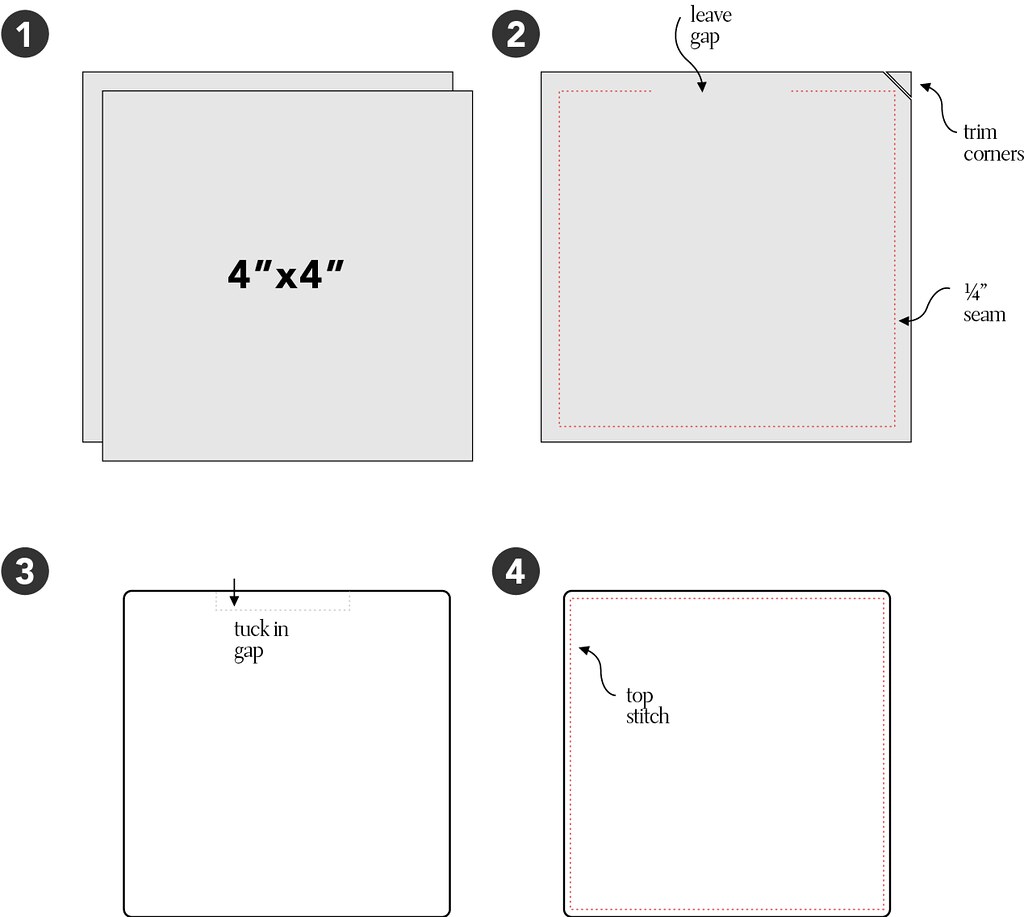
I love everything from Fog Linen and they've got these simple linen coasters I've been wanting to make for a while. Here's how:


  1. Cut two pieces of 4" x 4" fabric.
  2. With right sides together, pin and stitch around most of the perimeter (1/4" from the raw edge), leaving a gap of about an inch and a half. Trim the corners off.
  3. Turn the piece right side out, tuck in the seam from the gap and press with an iron.
  4. Top stitch around the piece close to the edge.
Voila! 

Saturday, August 3, 2013

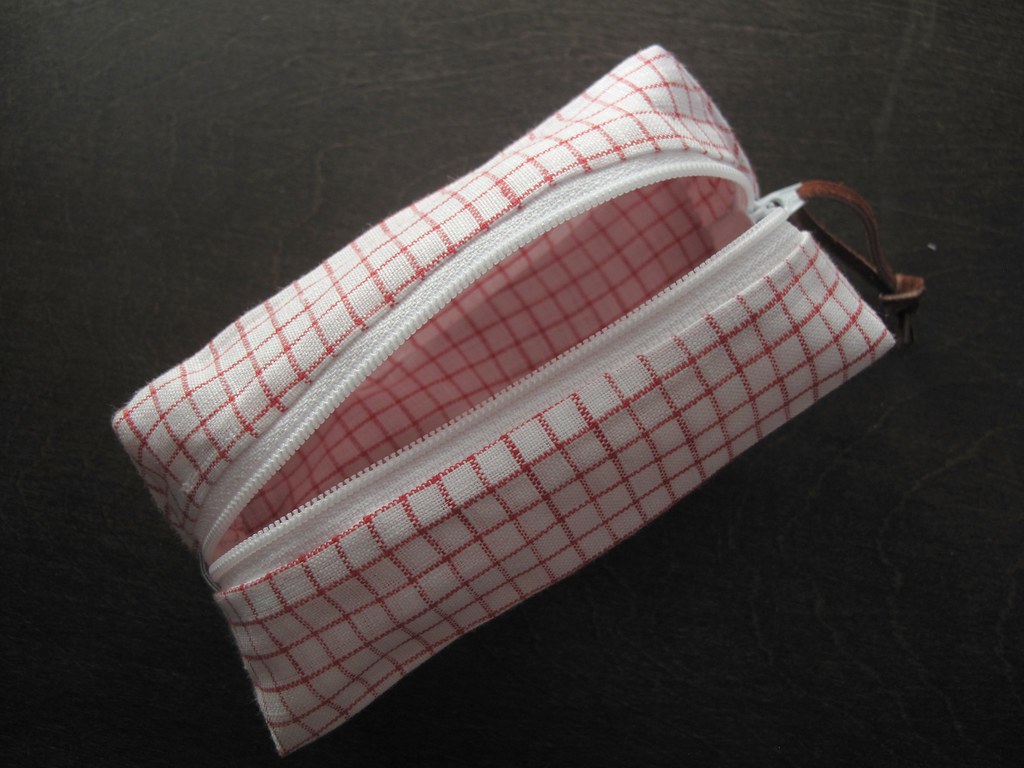
Small Pouch, Pencil Case


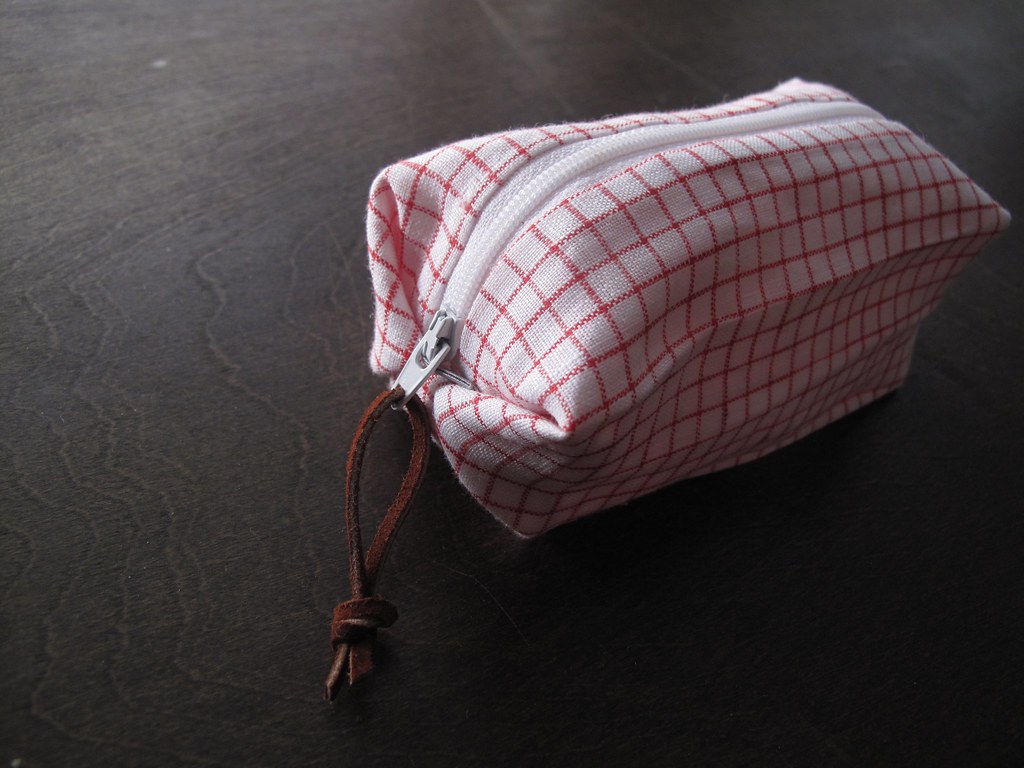
I could have sworn that a while (as in years) ago I posted on making little zipper cube pouches. I thought this was about to be a sister post, for a rectangular pouch, but I see no trace of this other post. This, then, is long over due! I recently bought a yard of fantastic red and white linen and then went to town sewing up my favorite quick projects and using it all up in a day and a half. It was so great to spend that much time sewing. I love these pouches. They take very little material and make great gifts, too.


Instructions after the jump!

Sunday, June 9, 2013

kitchen cabinet improvements and returning from the dead


Hello there to everyone who checks in every few months to find that we're still on semi-permanent hiatus! Jessica and I both have lots going on right now, and we decided a while back that regular updates are, for the moment, too much to handle. It was a strange feeling, when I baked my first cake after that conversation last summer, to realize that I didn't need to take pictures. I hushed the voice at the back of my head that said, "Explain why you're separating the eggs. Think of a narrative for this cake."

For now, I wanted to share a fairly major project in which Allen’s considerable handyman skills were completely crucial – I could never have done this on my own. We have a small kitchen, and we use it pretty efficiently. We utilize a lot of specialized storage devices, like spice jar holders that mount to the inside of cabinet doors, and a magnetic knife rack that I jerry-rigged with metal rulers and super-strong magnets. But Allen’s parents gave me a pasta maker for Christmas, and it’s the first item that, truly, no amount of kitchen reorganization would accommodate. It was re-do the kitchen, or move. Of course, neither of those is truly an option right now. But I had an “Aha” moment over this pin on Pinterest, and it blew my mind that I’d never thought of moving our existing cabinets up to the ceiling and putting open shelves below.

Saturday, March 9, 2013

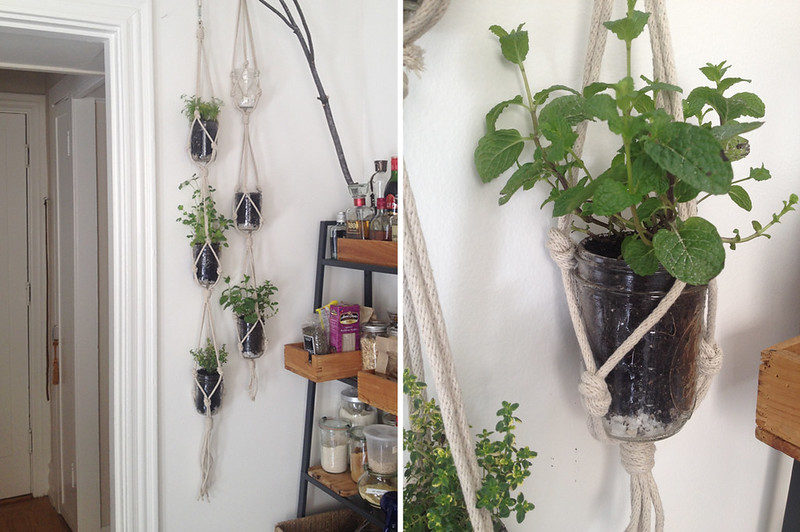
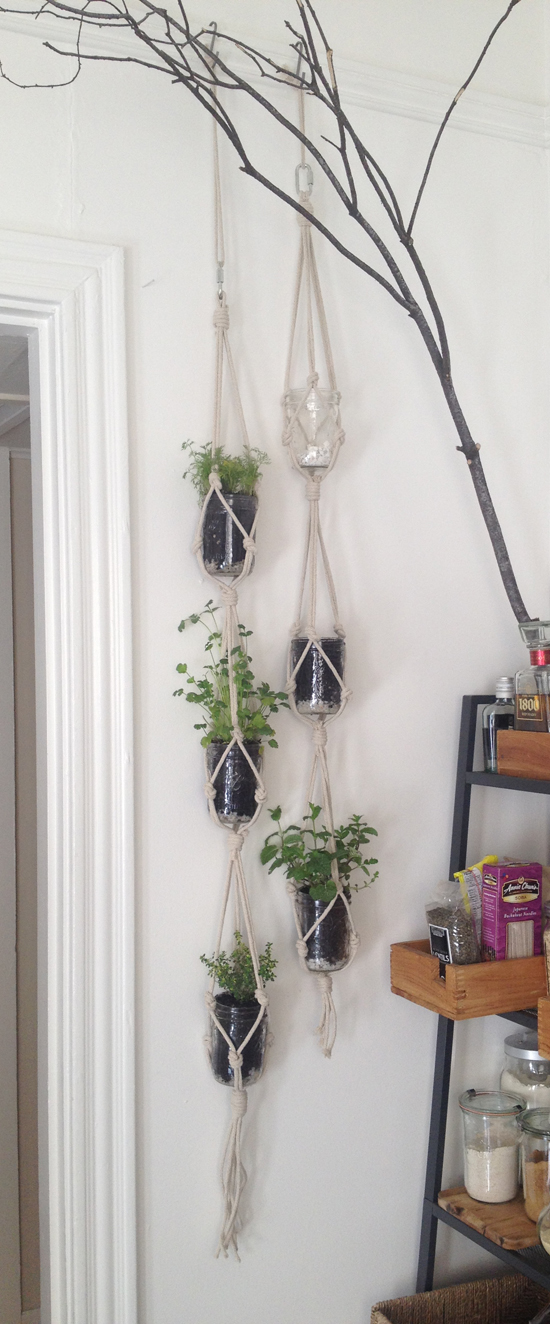
Hanging Herb Garden

Last weekend I made this hanging herb garden, a great solution for my tiny kitchen which has, oh, about 24" of counter space. At first I'd planned on mounting mason jars to a board which would lean against the wall but on my way to the hardware store it occurred to me to do it this way, which involves less infrastructure and is probably a little easier.

HANGERS

To make the two shown here, you'll need:


I find it helps to do make these while the rope hangs. Hang it from a back-of-the-door coat hook, or nail a small nail somewhere about 7' off the ground.

For each 3-plant hanger, you'll cut 3 pieces of cord 14' long and 4 pieces about 15" long (for your stop knots).
  1. Line up the ends of your long cords and fold in half. You should now have 6 lengths of 7' cord. 
  2. About an 1.5" from the bend in your cord, create your first stop knot. Mine had about 4-5 loops.
  3. 10" from your top stop knot, take two neighbor cords and tie a basic knot. Repeat for each pair.
  4. 4" down from the last knot, tie a basic knot between one strand of two neighboring knots. Be sure to be joining two cords that are already close - do not cross over a cord to tie to another cord. See the diagram and photo. Repeat for each pair.
  5. 4" down from the last row of knots create another stop knot.
Repeat steps 3-5 twice more to complete one hanger. Repeat all the steps to create your second hanger.

PLANTS 

I used mason jars. I've had some hearty herbs in lesser containers so I'm hoping they'll work. I put small rocks at the bottom of each jar, transfered the herbs, adding potting soil when necessary. The nursery didn't have basil starters yet so I'm growing them from seeds. Fingers crossed!

notes

You'll see that mine are different lengths, I started the first hanger with less cord than I needed and adjusted for the second one.

I have no idea what I'm doing with that branch.

How have you grown herbs in your home? Any other small space solutions? Have you done more adventurous macramé?

As it's now been weeks between when I did this and when I'm posting this entry, I'd definitely say put your plants in things meant for plants, not mason jars. What was I thinking?


Tuesday, January 22, 2013

Naturally Dyed Tea Towels

For Christmas I made a small batch of tea towels to give to friends and family. And since I'd had in my mind for a while to experiment with dying, I decided to experiment on friends and family.

After the jump you'll find the basic steps for creating a tea towel and what I did to create a gradient on the towels from blueberries and blackberries.


Sunday, November 25, 2012

Hello, again


You might have noticed recently a new post after a long, long while. My Code for America fellowship has just ended and I made a b-line back to making things. This year has been a whirlwind filled with lots of new friends, experiences, 22+ flights and lots of non-sewing projects.

Elizabeth is taking a break but I'm hoping I can start to get regular-ish again. I can't say how regular, my life could get crazy again (what and where will after CfA be?). But this site is important to me. I believe the best thing about the internet is sharing. If I'm able to share anything helpful, at any frequency, I want to. Also, now that I'm so front-end web development happy these days (and even blog about it now, too), the entire site might just get a big facelift.

But in other, seasonal news, I'm happy that my year has slowed down in time to get excited about the holidays. My boyfriend and I picked up this little tree (above) today (one of our favorite coffee shops in Oakland, Subrosa, is selling them) and I have all kinds of old-fashioned Christmas visions in my head. Handmade paper ornaments, popcorn garland...

Hope the holidays have kicked of great for you and thanks for sticking around!

Monday, November 19, 2012

Tote Re-Do


I once had a great, large tote. I used it often. After a while grime and grease from toting leftovers rendered the tote too gross to use (despite attempts to launder of course). I finally parted with the bag but I saved the hardware (handles, shoulder strap, d-rings) with the intention of re-creating it. A year or so later and 2 days before leaving for a trip to Argentina I decided, now is the time!

After the jump, illustrations and walk-through galore!


Friday, June 8, 2012

Post Fatigue


I set out over a week ago to write about post on a bag I made. Editing photos, writing and making illustrations has taken forever plus some. I have to take a break from it, whew! So here is a picture from my recent trip to Buenos Aires and the future post's artboard in Illustrator (which has gotten even more complex since this screen shot).

Have a great weekend!


Thursday, April 26, 2012

Anatomy of a Try


I thought since I took the time to make this, I might as well try and get a post out of it.

This is a clutch I made hoping to adjust this one (Which is missing! Where is it? It ran off with at least one cute hankie and one vintage pocket mirror. Sad.) a tad so that it served more as a wallet. It was not a disaster by any means, but it wasn't quite what I wanted:

  1. I forgot to add the ends to the zipper. This isn't critical, many pouches don't include them, but I really, really like them. I more often than not do one completely wrong thing in any project. Usually I catch myself while a seam ripper can still save me. Not this time.
  2. I thought I'd like it with more of the zipper tape exposed. I do not. I also did this weird thing with gold thread at the end as a zipper stop. I wouldn't have tried this if I hadn't done number 1.
  3. I created a divider on the inside, hoping to separate bills from coins and phone. I'm so-so about it. I also intended to have 3 card slots, stacked and side-by-side, 6 in total. I assumed my 7" zipper was long enough for that, it wasn't. (Three isn't so bad actually, I should carry fewer cards.) 
  4. It's about 2 inches too tall. This makes it dark inside and hard to read the bills and spot quarters from nickels. Maybe if it were shorter I wouldn't mind the divider as much.


I still really love this gold linen though. And there you have it. Not a disaster. Not a success. A try.


Thursday, April 12, 2012

Lemon Pudding Cakes


I love America's Test Kitchen, Cook's Illustrated, and Cook's Country. I have a mail subscription to Cook's Illustrated, and I tear out and keep probably three-quarters of the recipes in every issue. But I have an online subscription to Cook's Country - which, as far as I can tell, is the simpler, more down-home relative - and if I need a specific recipe, I go there first. Every one I've tried has turned out great, and they tend to be a little less fussy than the ones in Cook's Illustrated.

I've made this lemon pudding cake once before, exactly the way the recipe's written - baked in a single 8x8-inch pan. It's got a creamy, custard-y bottom, with souffle-like cake on top. A little whipped cream balances the tartness really well.

We've been having friends over to enjoy the deck that Allen built, and I thought that individual - and closeable - containers would make this really easy to set out at a party, and easy for guests to serve themselves. It also makes the recipe way more adorable, which is really important.

Thursday, April 5, 2012

Alameda Antique Faire


Hi, all! It's Jessica, and I'm still around. My days have changed, however, and more often than not I'm behind a computer. An important detail is that I'm happily behind a computer. I'm loving the work I'm doing with Code for America and learning as much as I can. I can be found in coffee shops in SF and Oakland or at the fantastic office of ours at CfA. So, while I'm still making things, they contain strings in code more than strings of thread. But, I promise projects from me won't be disappear completely, they'll just happen when they do in this new schedule of mine, and whenever they do, they'll definitely be posted here.

Moving on, I did go out to Alameda, an island just west of Oakland, to visit the antiques fair (or to them, faire). It's the first Sunday of every month. There is an admission to get in, which I thought was a little odd, but if you go around 10 (I know, late by antique market standards) it's just $5. The place is huge and if I weren't on my fellowship salary and basically already in possession of most things I need in my life right now, I would have gone to town. To. Town. I did pick up a couple things, though. I got 7 hankies, because I use hankies. Everyday.

If you're in the area, it's definitely worth a go -- even just for the view of downtown San Francisco.


Below you can see that we're not in Kansas. Oakland has a big port and these giant shipping crate dinosaurs provide the backdrop for rugs, old dressers and Fiestaware.


Sunday, March 18, 2012

Dark, Glossy Doors


I was tempted to just write another post in this vein, and leave it at that. Starting around my third full day of work on this, I started thinking, "This project just wasn't worth doing" (which Allen would have told me that at the beginning, if he'd thought it would make any difference).

Now that I have a few weeks of retrospect, that attitude is starting to change, but I think that's partly because I've blocked out memories of all those hours spent hunched over yet another door, sanding and patching and sanding again. Painting the doors in the hall opened a pain-in-the-ass Pandora's box - we had to paint the backs, too, which of course appear in the bathroom and both bedrooms - so the closet doors in those rooms would also have to be painted, front and back. How can such a small house have nine interior doors?

Saturday, February 18, 2012

Altering Jeans: Original Hem


Having a few alterations you can do yourself is a pretty valuable asset. Even having fake alteration assets is great, like how I take in sides, along the entire length, of a pair of pants or a skirt; I'm mostly guessing but it usually turns out good enough. But being able to properly take in a hem, is on the top of the altering-assets list. In this post I talked about taking in the hem of skirts with a blind stitch, and today taking in jeans using the original hem. There is such a difference in using the original hem versus creating a new hem on your own -- you're never going to get your new hem to look like the manufactured hem and, I think, that's quiet distracting and you might as well walk around in pants too-long. Plus, it's so easy to use the original. Tutorial after the jump!

Wednesday, February 8, 2012

Etching Glass


At left: our glass cocktail shaker with etched monogram. Right: Taylor's gift, and us as young woodland varmints.

This post is specifically about a gift for my brother, which he hasn't yet received. But, given that he'd never be caught dead reading this blog, I think it's safe to go ahead and post.

I am and always will be a Stevens, even though I'm also a Morris now. "Team Stevens" happened on day when I talked my brother into letting me go on a run with him, and then our dad asked if he could join us, and then we all forced our mother to come along. It just felt so silly and all-American, going out for a brisk jog with one's whole family. Obviously, Team Stevens was a thing that needed a logo, and once that logo was created, it needed to be on everything. I think I had patches made at some point.

When my brother turned 21, I wanted to put the logo on a beer mug for him, but I couldn't find a company that would custom-etch glass products in such short runs - as in, one. Then I discovered etching cream. It's cheap, it's easy, and it allows you to customize glassware at home. I bought it at Sam Flax, but you can also buy it at Amazon, where the product description reads: "NOT RECOMMENDED FOR CLEANING GLASSES!"http://www.blogger.com/img/blank.gif

My brother broke his beer mug in his last move, and he asked that I make him a new one. The process is as simple as this:

Saturday, January 28, 2012

Pretty-Good-For-You Apple Crisp


Some otherwise completely sane people believe that every dish presents an opportunity to ruthlessly cut fat, salt, and calories. That's not me. While it would be recklessly dishonest of me to say that I do everything in moderation, I believe that a cook has a duty to aim for the sublime, and if transcendence is achieved with a stick of butter, then try to limit yourself to a few bites.

That being said, I’m always glad to find a healthy recipe that delivers on more than just fiber, and I’ve found that Cook’s Country – the sister publication of Cook’s Illustrated, and published by public TV's America’s Test Kitchen – actually has some pretty great ones.

Most of the excess calories in a fruit pie or cobbler are delivered by a buttery, sugary crust, and it just can't be made healthy. A whole-wheat, low-fat pastry dough is an abomination that none should endeavor to eat. The pastry part of this apple crisp is rolled oats, a few pecans, a sneaky secret ingredient, and a little bit of butter and sugar. It’s delicious and satisfying. (And begs for you to keep in mind that two tablespoons of whipped cream have only 50 calories - a little cream adds a lot to this dessert.)

Monday, January 16, 2012

Quick Drawstring Bags


I've posted on a few kinds of drawstring bags already (here and here), could there be more? Of course. These are about as quick and dirty as it gets. It's also a good way to use up extra fabric (that you buy and buy without a project in mind and then you end up moving it across the country and promising yourself to find ways to use it and store other things, like air, under your bed). Instructions after the jump!


Wednesday, January 4, 2012

Otomi-Inspired Appliqué Pillow


I think a lot of us have a contrarian streak - a tendency to resist things that are popular, and especially things that cross the line from popular into ubiquitous.

One night in December, Allen and I were driving to a barbecue place for dinner, and we passed a lot of houses decorated with white Christmas lights, and a few with colored Christmas lights, but only a couple with icicle lights - the ones that were so rampant for the last ten years or so. Not the molded plastic ones that are actually shaped like icicles, but the light strings that have smaller little strings hanging off of them.

I said to Allen, "Do you think, now that those icicle lights aren't so popular anymore, they're okay for us to start using?"

Allen was shocked. "You like those?" he said, indignant.

"Yeah, I really like them! But everybody uses them, so we've never used them."

"No," said Allen. "We don't use them because they don't look like real icicles."

"What?"

"Yeah, nobody uses them right. People hang them where real icicles would never be - like on the back sides of beams. That doesn't make any sense."

"Allen, of course it doesn't make any sense. They're not real icicles. Even if you 'use them right,' nobody is going to look at them and say, 'Wow - somebody waited for a snowy day, hosed down their porch roof, got those those beautiful icicles to form, and then somehow lit them from the back.'"

"You're twisting my words."

So I understand perfectly a natural aversion to trends. Otomi embroidery has been all over the internet for a few years, but I still love it so. I have loved it since my grandparents had some in their "Mexico room" when I was a little girl.

The animals, y'all! They are such great animals. Actually, if I have any disappointment about the way my pillow turned out (other than the time it took, which was more than I expected), it's that the animals aren't as crazy-whimsical as the weird, fantastical creatures that populate real Otomi embroidery.

Wednesday, December 28, 2011

Draft Dodger


Guys, I sewed something! I am happy to contribute my first project post in many months. I'm also happy to be settling in here in San Francisco and to have my sewing machine not in a box.

This project was born of necessity - my new room's windows are drafty and it gets pretty chilly here in SF. As soon as I could, I made two of these. This is a simple project; if you've got a drafty door or window there's no excuse not to whip one up yourself. The part that takes the most time is picking up the rice from the store. Instructions after the jump.

Also, New Years is upon us! Don't forget your lucky greens and black-eyed peas.

Sunday, December 18, 2011

Speaking of making gifts ...

Things that aren't worth making at home:

No. 29: Cherry cordial candies

I admit defeat.