


Other supplies: ribbon, machine or will to make button holes
Serger note: I used a serger, but you can use a zig zag stitch close to the edge, too.

*that black dot in the center just illustrates the center, I'm realizing now it may be confusing and unnecessary in this illustration, whoops.
1. CUT & BUTTON HOLE
Cut into a rectangle and allow at least 3.75" for your draw string tube. Serge (or zig-zag) the two short raw ends.
Create a button hole in the center of the short side, about two inches down from the raw edge. The exact dimensions will depend on the size of your button hole, but you want it to fall in the center of the 1.5" tube space.
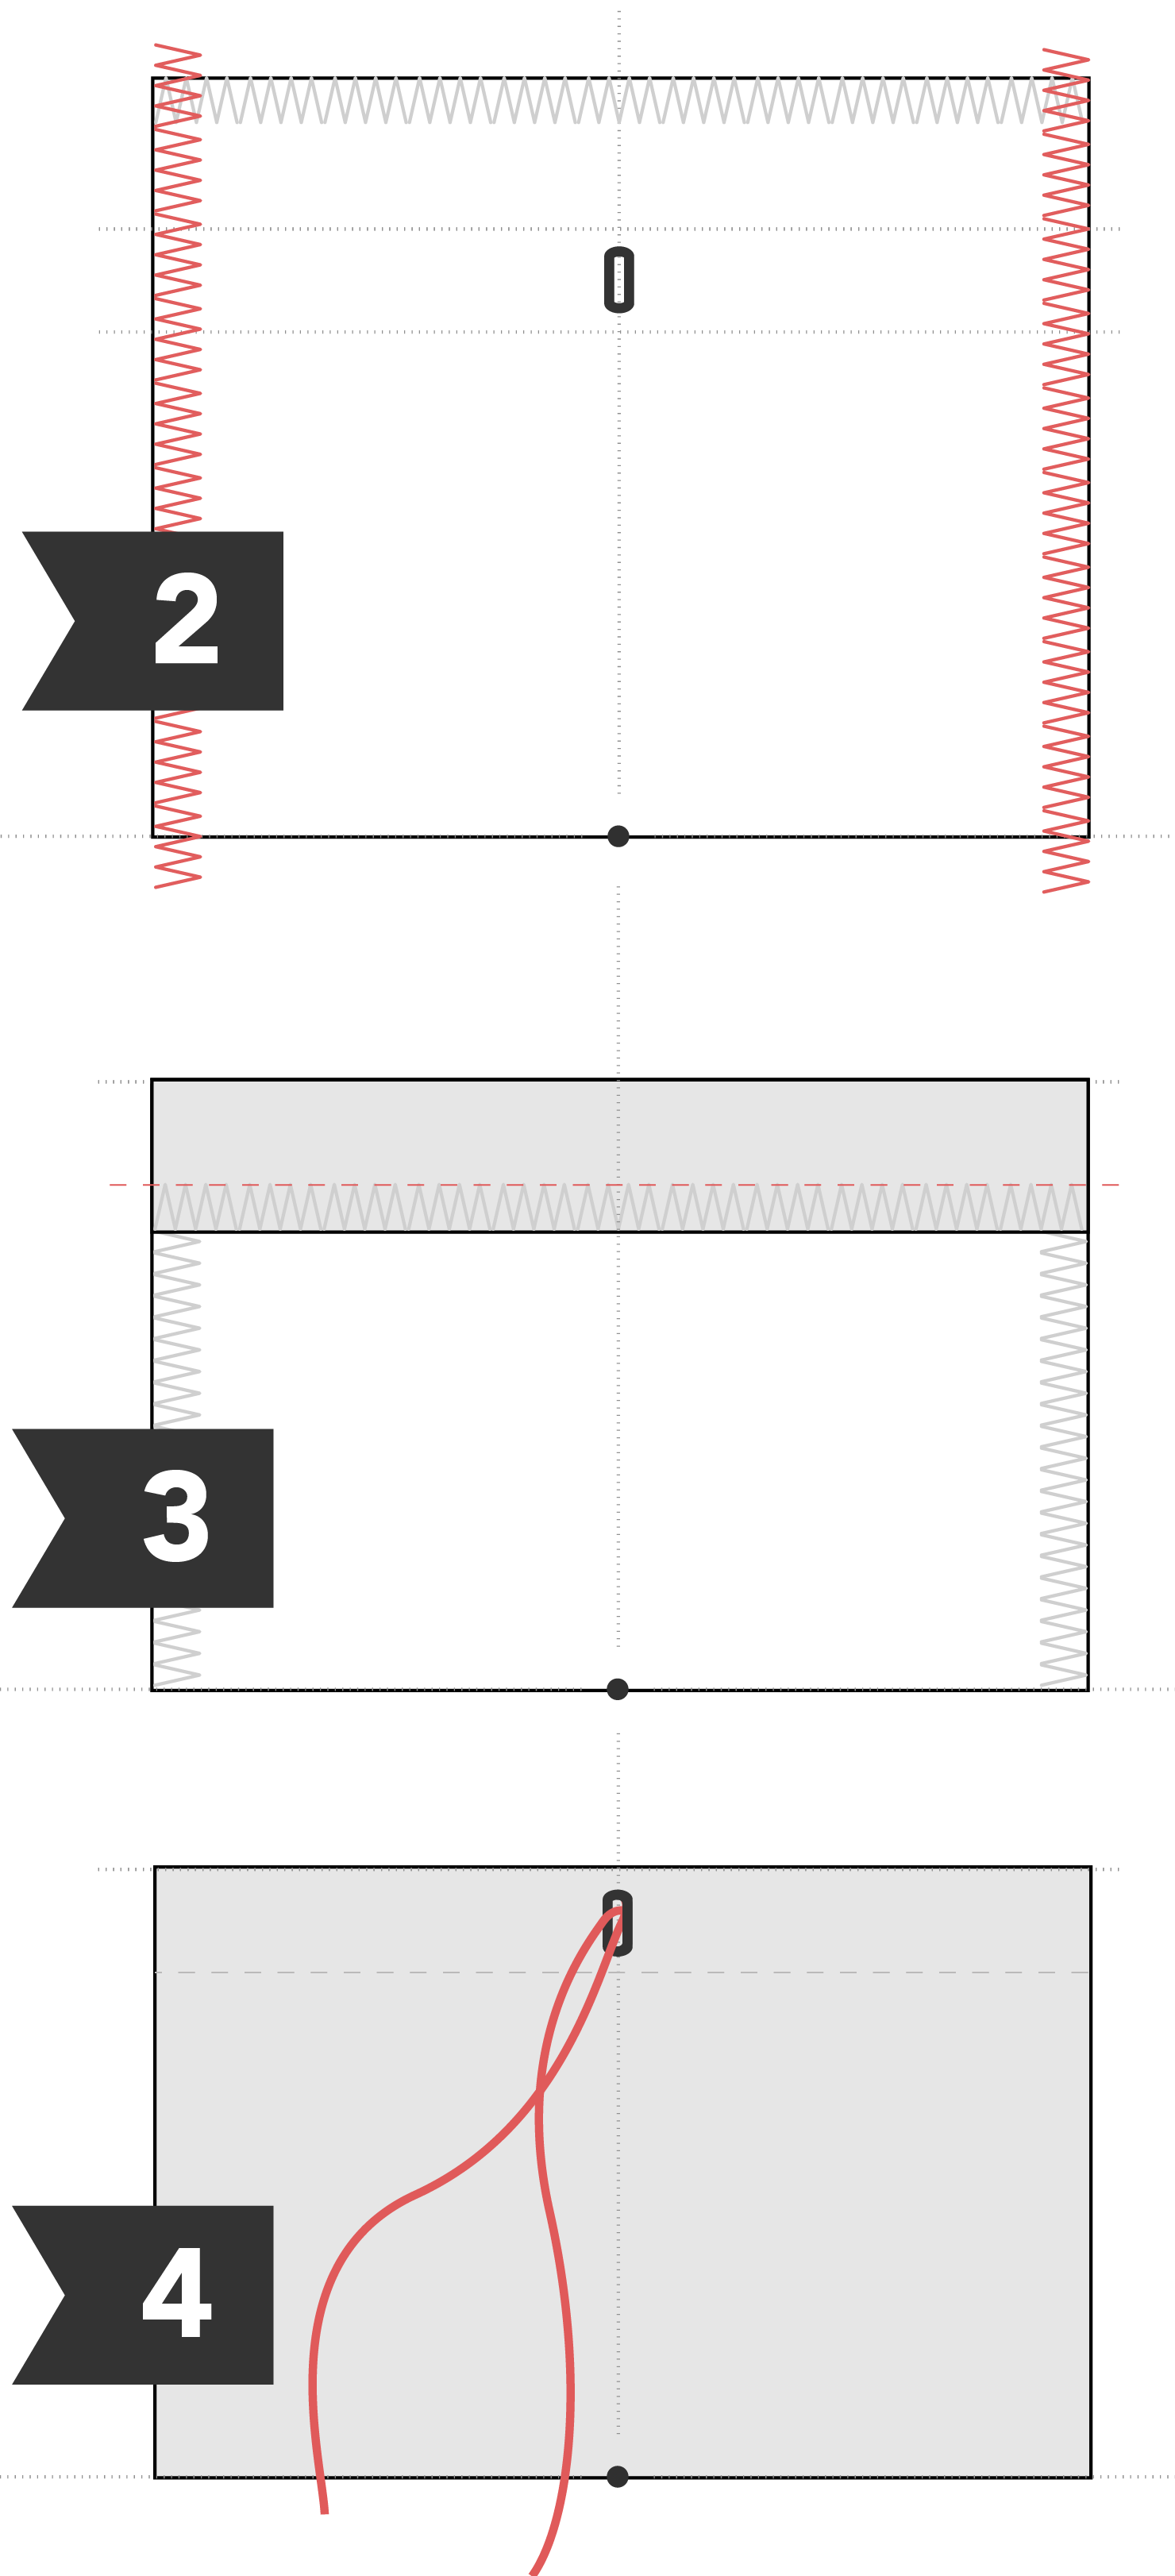
2. SEW SIDES
Fold the rectangle in half, right sides together, matching the two short ends you've serged/stitched. Serge/stitch the left and right sides together.
3. CREATE DRAWSTRING TUBE
Fold down the first edge you stitched in the first step so that your button hole is in the center (inside) of the fold you're making and the top of the zig-zag stitching. Press your fabric and then stitch around the bag, following the top edge of the zig-zag stitch.
4. FINISH
Flip right-side out and feed ribbon in the button hole and back out from the other side. Done!


These are about as quick and dirty as it gets. It's also a good way to use up extra fabric (that you buy and buy without a project in mind and then you end up moving it across the country and promising yourself to find ways to use it and store other things, like air, under your bed). Instructions after the jump!
ReplyDeleteI know this might sound a bit too far for some people, but I think it's great!! Just take a look at my nice folded carrier bags! they look tidy and take up a lot less room under my kitchen sink. custom printed carrier bags
ReplyDelete