

For a long time, I’ve basically had unhemmed scraps of fabric fighting back the western sun at our dining room windows. Though it was a great little Oliver Twist aesthetic, I decided it was time for some more grown-up curtains. The following is a little tutorial thereof.
This grown-up is a little broke, but Allen and I had store credit left over at Macy’s from our wedding (I hoard store credit – we could refurnish our house with West Elm store credit), so I ordered two inexpensive king sheet sets from Macy’s.
I wanted the curtains 84” long, and I also wanted French pleats. I’m not sure what the correct terminology is as far as French pleats versus pinch pleats go – maybe a French pleat should have three folds, while a pinch pleat has two. Whatever; I went with two front folds, for a simple, crisp look.
King flat sheets are about 108 x 102 inches; fitted sheets are about 76 x 80”. The French pleats (I’m calling them French, for a little international flavor, correct or not) eat up about a third of the total width, and I wanted the finished curtain to be about 50” across at the top. Our windows are three feet wide, and I wanted a little extra room for the pleats to hang nicely. At the bottom, where there are no pleats, the curtain will obviously be wider.
I cut the corners and the elastic out of the fitted sheets so that I could lay them flat, and I cut them about as wide as I possibly could. Once the corners were cut out, the sheet was roughly the following dimensions:

I cut the flat sheets to match. My problems with curtains are: a) there is no room in our house that comfortably accommodates a six by eight-foot swath of fabric with room for pinning and ironing, so I basically pushed all the living room furniture to one side of the room and rolled up the rug so I could use the floor in there. And, b) it is so hard for me to cut fabric square. Maybe other people have problems with that, too. Although the dimensions were roughly correct, when I started ironing, I realized I had made all my cuts at angles with the weave of the fabric. So in correcting this, I’m sure I trimmed off another inch or two from each sheet.
Anyway, I pinned two rectangles together at the edges, outside-in, for each curtain, and then I sewed around the edges, leaving a 6” gap at the end so I could pull the fabric out on itself. This all sounds easy, but it was a long, tedious, too-boring-to-describe here adventure.
After pulling the curtains right-side-out, I laid them back on the floor and ironed them on high heat, spraying them with a water bottle to get the two rectangles to adhere to each other a little. While ironing, I folded the fabric in at the gap I’d left at the hem, and ironed it down so that it looked hemmed.
I went back to the sewing machine and sewed the gap closed, keeping about 1/8” away from the edge of the fabric, to make it as discreet as possible.
I laid the curtain flat (not an easy task in a house whose average room size is 10’ x 12’), and put pins in the top where the pleats would be. Since each pleat eats up about ¾” on either side of it, I positioned the two outside pleats closer to the edge of the fabric than to the pleats next door. I had 12 drapery rings for each curtain, so I divided the width (76”) by 11, and then subtracted a little from the sides, adding the remainder to the other measurements. After some trial and error, my dimensions came out like so:

The little fractions are hard, but I went by 3’s, marking 21 1/3” at a time, then going back and dividing that into three, for the sake of better accuracy.

With these marked, I measured again, 6” below the top hem, so that I would have straight, plumb pleats, and marked the intervals again.
Then I used straight pins and alligator clips to fold the marked line back, away from me, and then to fold towards me on either side of the mark. The finished pleats are about ¾” deep. I ironed these for a nice crease, first with the pins in. Then I removed the pins and re-ironed, to get rid of the little dimples that the pins left before.
Next, I sewed the pleats in place. I measured 6” down from the top of the curtain, and sewed five quick stitches in each place. Then, I stitched the pleats together at the tops. I did this at the very top of the curtain, rather than on the front, so that it wouldn’t show, and so the pleats could open up a little at the top. The two sets of stitches look like this terrible drawing:

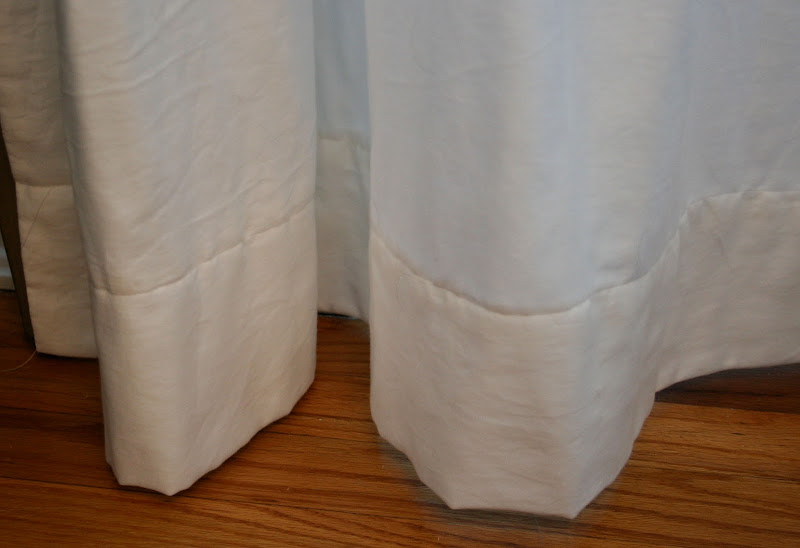
Then I sewed drapery clips to the top at each of the pleats and hung them up! Once the curtains were hanging, I folded up the bottom by about 8”, so that they just skimmed the floor. Then I took them down, hemmed them, and re-hung them. I like the look of the really generous hems.


Holy cats woman! I love this! And I have been going back and forth about redoing our living room window hangings forever (we have vertical blinds right now. Blech.)
ReplyDeleteFABULOUS IDEA using sheets! I am actually going to check the second hand store this weekend and see if I can find something good. Thanks for the great idea!
I can remember growing up my mom made curtains for the kitchen using sheets from a linens warehouse store. She has three windows and a window in the door, so it made sense to economize. I never thought of making pinch pleat type of curtains though, I always just made a simple rod pocket and hem. I'll have to remember this trick!
ReplyDeleteWOWZER. GORGEOUS. I'm inspired.
ReplyDeleteperfect. love this.
ReplyDeleteYour site is fantastic. I’ve bookmarked your site in my browser; I hope in future days I’ll get more valuable information from your site.
Delete