
After the jump, illustrations and walk-through galore!
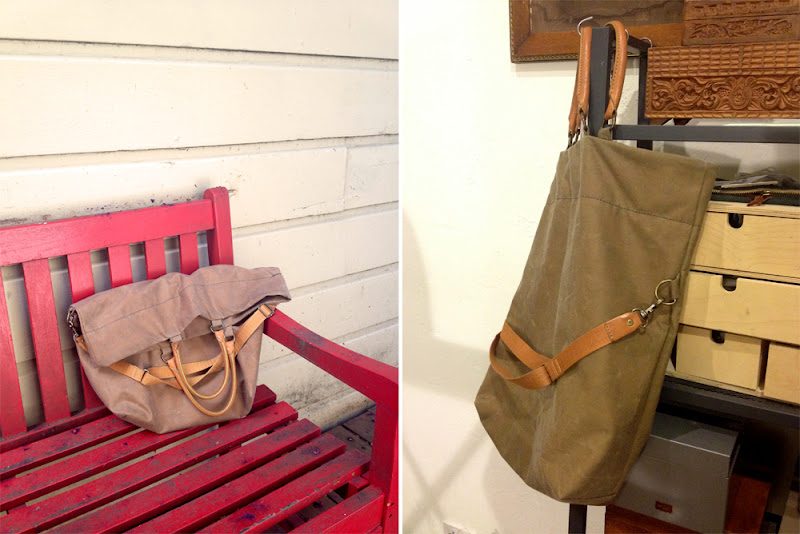
I'm being intentially vauge on some of the dimensions in the post, I'll leave it up to you to decide how large you want to make your bag. Mine is fairly large (which makes it great for a plane carry-on bag and for biking around with my computer and layers of clothing as is appropriate in San Francisco). The tutorial explains the elements and construction.
Besides the basics (sewing machine, needle, thread..) you'll need:
- For the exterior, I used a medium-weight waxed cotton. It's gorgeous!
- For the interior, I used a basic cotton calico.
- To stitch waxed cotton I used a heavy-weight fabric sized needle in my machine and nylon upholstery thread, in black.

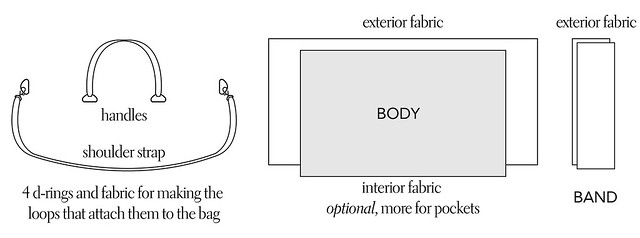
- The diagram above illustrates the elements of the bag.
- When you determine the dimensions you want for the face (pink area) to be, you can generate from that the size of fabric to cut.
- WIDTH = body "face" width + 6". Your band width should be the same.
- LENGTH = band + body "face" length + 6" + body "face" length + band
- Your interior fabric should be the same dimensions of the bag, minus the band. It will sit under the band on the inside.
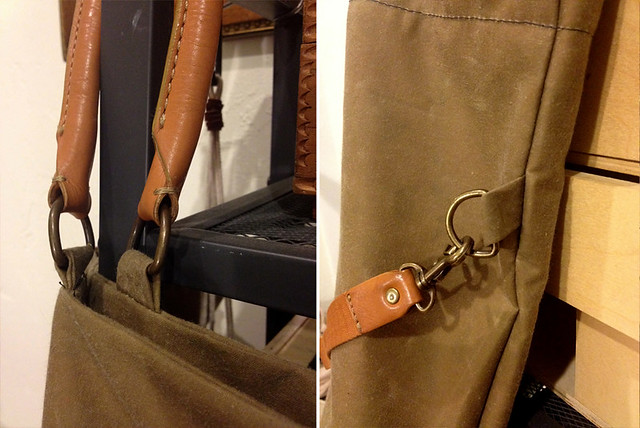
- Make 6 pieces of fabric to be your loops to hold on the d-rings. To do this, measure the flat side of your d-ring (approx. 1" in my case) and double that number, then add on 1/2" for seam allowance. That will serve as your width. Make it at least 24" long. You should have a long rectangle. Fold right-sides together lengthwise and press. Stitch 1/4" from the raw edge down the length of your piece. Then turn right side out and press again, now you've got your tube for d-ring loops. Cut into 6 pieces approximately 3-4" long.
Construction
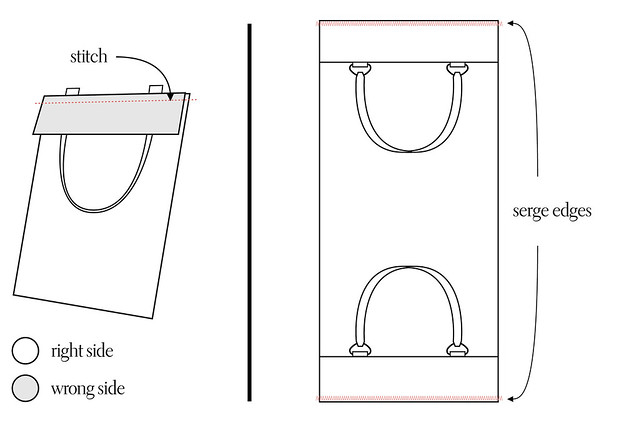
Since I don't heavy heavy duty industrial machine and was worried about the layers becoming too think to sew through, I did a few things to keep thickness as low as possible. One such thing was to serge the raw edges of the band. (right illustration)
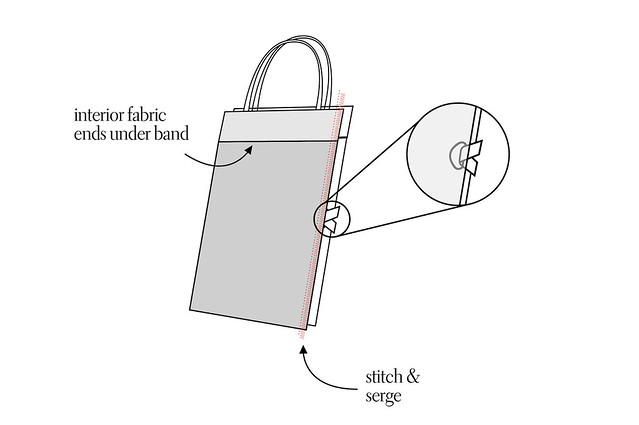
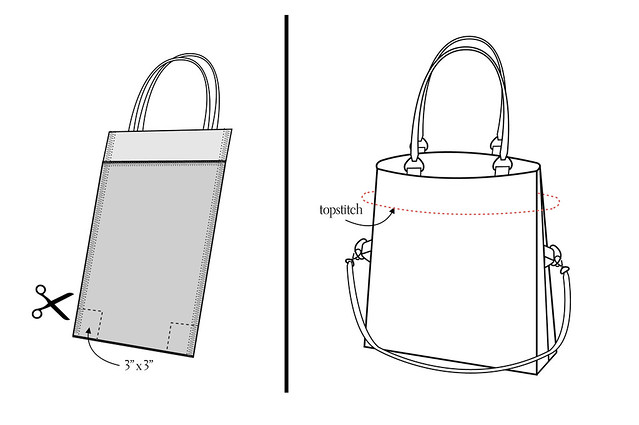
Pinch the cut out so that the two cut lengths are together - it should start resembling a bag bottom at this point. Stitch or serge this combined raw edge.
Flip the bag right side out, it should like a bag, yay! Fold the band down towards the inside of the bag and pin in place. Top stitch around the bag about a 1/4" from where the band ends on the inside. (right illustration)
Great to see you back!
ReplyDeleteThis is awesome. Thank you for taking the time to illustrate and explain your process of making the perfect shoulder/messenger canvas bag. Going to try it soon, once I get all the metal parts and leather!
ReplyDeleteGreat tutorial! Thanks for all the diagrams.
ReplyDeleteLooks great! And the tutorial is so detailed, Thanks for sharing!
ReplyDeleteÓtimo tutorial!!!!!!!!!!!!!! Explicação maravilhosa!
ReplyDelete